A Little Vintage Knitting

3.28.2015

Once there was a girl that had a big coat to sew. It was blue and pretty, but sooooo big and the sewing room was soooo cold. Instead of sewing that big coat, she cast on a new sweater pattern and gleefully knit it every chance she got.  When watching murder mysteries, when cocooned in her bed, when stuffing giant bars of chocolate/slices of cake into her face. (As a lizard person she had to keep up her mammalian facade with winter carb loading to deflect suspicion.*) It was the perfect way to spend those single digit winter months and the purple sweater pieces just rolled off the needles. She happily hugged them and thought "Soon, they will be sewn together and warm up my cold, cold lizard blood. Then nothing will stop my evil plans!"

Ohhh hi....how long have you been standing there? Crazy story right? Lizard people knitting and what not. No, no, doesn't pertain to me at all. First rule of lizard people is not talking about being lizard people.  Annny way check out this new sweater that I, who am not a lizard person, knit this winter. *Adjusts Mask*
This baby is "The Sweetie" from Subversive Femme, an Etsy store I only know about thanks to Tasha's lovely "Ten of Hearts Cardgian."  The pattern took my fancy because A) the model is lounging around in a deck chair like she has nothing to do today but drink until she falls out of said chair. B) This pattern seemed like it would be a good match for the Madelinetosh Tosh DK yarn in the stash. I guilt bought the "Flash Dance" colorway at my local yarn store some years ago. (Guilt buy definition - Buying something in a store because you feel it's rude not to.)  
The yarn was a guilt buy because there were only 4 skeins left and that's not enough to cover my cake enhanced body. Instead of putting the yarn down like a sensible person, I Scarlet O'Hara-ed it up pushing my credit card across the counter while thinking "Fiddle dee dee, I'll think about it tomorrow/distant future. The purple color must be MINE!" 
Years later it seemed like I could finally stop thinking about what to do with that yarn. Surely a cropped cardigan could be squeezed out of 4 skeins. (Spoiler - It can't, but more about that later.) I also wanted to take the opportunity to try out a vintage knitting pattern that was fairly easy. The Sweetie is the vintage equivalent of splashing around in the kiddie pool. Here are all the pros:

- The pattern has multiple bust sizes already worked out, including my usual 36" size. 
- No fancy stitches, only easy stockinette stitch and garter stitch.
- The cropped length means you only have to worry about waist and hip measurements.  
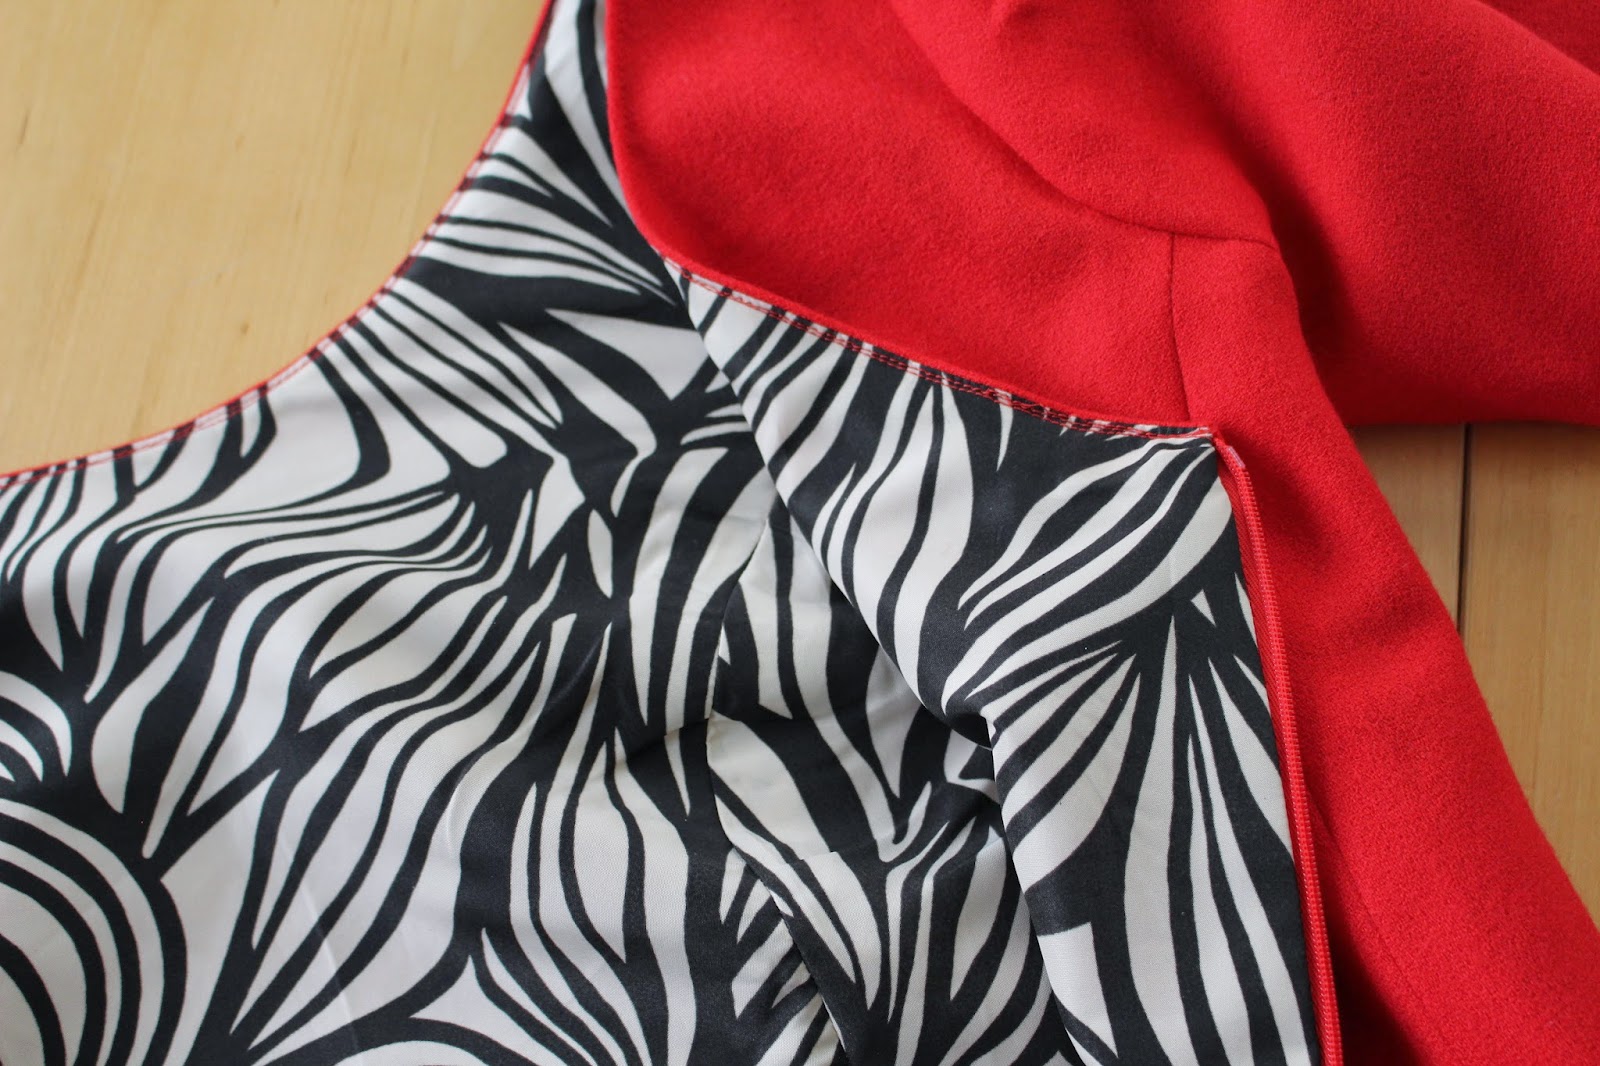
- The waist area is all garter stitch, which gives you some sizing wiggle room due to it's stretchiness.

If you're a seasoned sweater knitter like I am, the only thing you really miss is a nice schematic of the garment's finished measurements. We modern day knitters are so spoiled.

Project Notes
1. I knit a straight size 36" bust even though my waist measurement is usually a size bigger in vintage patterns.  This worked out fine.

2. All the garter portions were knit on size 6 needles and the stockinette portions on size 5.

3. The length of the body is very short even to someone with a short torso. I added 2 extra inches of length before starting the armhole shaping.

4. The button bands are knit separately from the body of the cardigan and seamed. This lead to the question of how long to make then since I'd added 2" of length to the main body. I'm sure this could have been figured out mathematically using row gauge, but that's not my style. My solution was to leave the stitches on the top of the garter bands live, seam the band to the cardigan, and then match the length to the top the neck.  I also decided to space the buttonholes further apart then instructed.  Sadly this part bit me in the butt and the top buttonholes way too high.  I had to rip that button band out and re-knit the button holes with the spacing suggested in the pattern.

5. Added 1/2" more length to the sleeves before starting the sleeve cap shaping.

6. Four skeins were almost enough for this sweater. I got everything knitted but the upper half of the second sleeve. Luckily Madelinetosh is pretty easy to find and I bought another skein off of yarn.com The dye lot was a bit different, but the join isn't that noticeable when you wear the cardigan. Since the color change happens right at the elbow it looks more like a trick of the light.

7. Buttons from Etsy store Yummy Treasures. They have plenty more if you love them. Due to the garter button band I did sew them together with some clear buttons to help support the weight.
The Sweetie was a great TV knitting project with only a little shaping to keep track of. I found the majority of the process to be fun and go rather quickly. Having to reknit one of those button bands was a bummer, but hey I can't blame anyone for that but me.

I'd say that the finished sweater is 90% a success.  The length is perfect to go with skirts and the amount of ease through the body and sleeves is to my liking.  I'm also fond of the double breasted look and the cute little wing collar.  My main beef is with garter button bands in general. I love the look of the stitch, but it's always too stretchy for buttons to stay where I want therm. That one bottom button on the cardigan seems to be doing it's own thing no matter how I adjust it.  Get back in line you free spirit!!!!  My other small beef is that the Tosh DK yarn base seems to start pilling immediately. I've used this yarn before so that was more of a known variable rather than a surprise. I'll concede that it's a decent trade off for being able to get your hands on prettily dyed yarn a lot easier than Sundara or Wollmeise.  Though when my money tree sprouts I'll be buying all the Sundara and dancing on your human graves knitting lots of sweaters.
So that's the skinny on my winter knitting and no information what so ever about lizard people. If you'd like the short and sweet version here's the link to the Ravelry project page.

* Yep, making old school "V" jokes again.  I might have lost my shit when Titus made a V joke in episode 6 of  "Unbreakable Kimmy Schmidt." Haa haa you crazy guy, we don't use spirit gum.

Photo Tutorial - Reinforcing underarm gussests with silk organza

3.24.2015

Warning - this post is only going to appeal to some of you.  If underarm gussets are something you're never gonna sew, then mark this post as read and we'll talk fun things later. Fun things like cake, or Froggie, or eating cake with Froggie.

OK then, I'm assuming that those of you who have stuck around are wild about gussets. After all having a better range of motion in a kimono sleeve is something to smile about.
Sewing gussets is a bit of a different story. Like fly front zippers, my brain refuses to remember all the sewing steps no matter how many times I've sewn them. The directions on the Advance pattern were a bit vague, so I cracked open a few sewing books to refresh my memory.

The book I ended up using was Gertie's original text "Gertie's new book for better sewing." Her steps included using silk organza to reinforce the seam.  I had silk organza, gussets and a camera, so I took some pictures of the process. I'm not inventing anything here, just providing a pictorial overview of the steps.  As a visual learner I though it might be helpful to others who learn the same way.

Sewing Gussets with Silk Organza
For reference - My pictures correspond with steps 5 and 6 of the Wiggle Dress pattern.

Step 1.  Mark the gusset stitch and slash lines on your bodice.  Note -You'll be sewing the silk organza to the right side of the fabric. 90% of the time you'll be transferring the sewing lines onto the right side of the fabric as well. On my project I ended up putting my marks on the wrong side because of the black background. (My chalk was hiding that day.)

Step 2.  Cut out a piece of silk organza that is a bit larger than the gusset area. Pin it over the marked lines on the right side of the fabric.

Step 3.  With a small stitch, stitch directly on top of the marked stitch lines.

Step 4. Slash on the slash line up to the tip of the stitching.

Step 5. On the right side, fold the silk organza towards the slash and press.

Step 6. Draw in the seam allowance on the gusset piece

Step 7. Pin the gusset to the bodice, matching the drawn in stitch line on the gusset with the stitched line on the bodice,

Step 8. Stitch the two pieces together by stitching directly on top of the line stitched in Step 3. Try to keep any wrinkles from getting under the needle while pivoting at the tip of the gusset.

Step 9. If the gusset is pucker free than press it with the seam allowances out like this.

Step 10. Flip the bodice to the right side and edge stitch around the gusset seam.

Step 11. Turn the bodice back to the wrong side and trim the silk organza a little smaller than the seam allowance.

The finished gusset will look like this on the wrong and right sides.

Then you've got to go sew 3 more gussets! I suggest rewarding yourself with chocolate after completing each one. Then when you're all done go have a piece of cake with Froggie. Those calories don't count.

Sewing with the Pattern Stash - The Planned Project, Advance 9441

3.20.2015

Let me tell you a little story about a vintage pattern. Back in May of 2010 I was quickly entering the "Jubba the Hut" phase of my pregnancy.  My days were pretty much filled with lounging on flat surfaces, stuffing food in my mouth and dressing Froggie up in golden bikinis. All that was missing was a bug eyed puppet to laugh manically at my witticisms. Should have added that to my baby registry.  Anyway I filled the "non eating/regurgitating that same food" time with melodramatic groaning and surfing the internet. Several sewing blogs were on regular rotation and that is how Advance 9441 waltzed into my life.
Oh hello, just standing around being fabulous. 
Avid readers of Gertie's blog may remember that she made this pattern in 2010 out of some lovely lemon print cotton. Droooool lemon print cotton. I would have happily swiped that dress from her closet, but I was equally taken with the fashion illustration for this pattern. Does the brunette look like Audrey Hepburn or what? You can almost hear her swishing around on that giant skirt. Her crinoline must be magnificent!

If I'd been sewing at that time this pattern would have gone on the top of the "must acquire" list. In reality constant nausea sapped all my creative energy and easy knitting was all that I could mange. Then I got involved with having and feeding a small human and things like getting more than 2 hours of sleep were more important.
Through the years this pattern popped up on Etsy and Ebay semi regularly. It was always either the wrong size or more than I'd like to pay.  The pattern would get favorited and usually be purchased by someone else. Things might have remained that way if  Michelle hadn't posted her version of the dress. Oh My God! This pattern needs to be mine!  After wiping the drool off my keyboard the internet search engines were put to use.  In a twist of good fortune I found Advance 9441 in my bust size AND on sale at the ebay store Vintage4me2. (Great store BTW. They have a nice selection and the customer service is good.) And that my friends, it how this full skirted beauty is now hanging in my closet.
In my excitement of finally owning this pattern, I also acquired 4 years of rayon twill from Black Bird fabrics. Planned project is a go.....except that it sat around for a month while I puttered around with the Butterick coat. Then several other projects got sewn after that. Yeeeeep, this project was well on it's way to stash closet of forgetfulness.  To keep that from happening I made it my planned project stash bust for the month.

The style lines of this pattern are pretty simple, kimono sleeves with gussets and a full paneled skirt. Sewing the gusset area is the only part that needs intermediary sewing skills. I consulted Gertie's first book to refresh my brain on this area. (There will be a separate post about this because I was playing with the new camera.)The rest of the sewing is easy, if time consuming work.  Hemming the skirt took a whole 6 hour audio book.
This was the first time I'd ever sewn with a rayon twill, so here are a few notes about it.
- It is thicker than regular rayon, which makes easier to work with. I did not have to take any special steps, like starching, to cut out the fabric.

- Rayon is still a tricky beast and will make you do some extra basting.  For example I pinned all my waist seam joins before sewing the seam. This technique often works with well behaved fabrics, but with rayon all the joins were 1/8" off after sewing.  I had to pick out the entire seam, baste all the joins and sew the seam with a walking foot. '

- The twill weave is prone to snagging. With the black background it shows as a visible white line. Take extra care handling pinned pieces and try to seam rip from the wrong side of the fabric.

While rayon twill won't suppliant my enduring love of cotton sateen, but I don't regret purchasing it. The print is just divine.  And on that note, let's get to the pattern review.

Pattern
Advance 9441 (There's a 32 bust and a 36 bust on Etsy at the moment that I'm posting this.)

Fabrics used
Rayon Twill from Black Bird Fabrics. (Still in stock as I post this.)

Pattern changes/alterations
- Dropped the bust dart 1 1/2" and shortened the front waist dart by the same amount.

- Made a 1/2" hollow chest adjustment to the front bodice.

- Lengthened the sleeve 5/8" along the shorten/lengthen line. This put the elbow dart in the correct position.

- Added 5/8" to the side seams since my waist is 30" instead of 28". I could have added less as the full skirt makes the area roomy.

- Increased the back dart intake to 2 1/8".

- Removed 1 1/2" of length off the skirt.

Confessions/Advice
- The fashion illustration would leave one to believe that the hem length of this dress would fall just below the knee.  I'm an average high of 5' 6" and it hit a bit below mid calf.  In addition to the long length, the hem facing on the pattern is a whopping 2.5".  You could easily shave off some yardage reducing these two areas.

- I seem to be having bad luck with necklines lately. The front neck facing does not want to stay inside the dress.

-  Although I love this print of this rayon, it's probably too soft of a fabric for the design. The fabric recommendations included much stiffer fabric such as taffeta and pique. Both the bodice and the skirt could do with a bit more body.

- This skirt could really use two petticoats or one with a lot more volume. At this time I only had the one 35 yard petticoat to pad it out.

Husband Comment
"I like your sleeves. They only go down part way like a baseball players."

My Final Thoughts
Is Advance 9441 everything I'd hoped it would be? YES!!! It's a great kick off for my #vintageplege goal. Even though hand hemming the skirt was a half day marathon, I'd already like another version of this dress. One with the shorter sleeve length to wear during the summer months. Maybe in a lemon print, maybe.

Sewing with the Pattern Stash - The TNT

3.16.2015

Confession - This outfit was sewn last month before I'd even given any thought to the this month's stash busting theme. It just happens to fit into one of my suggestions of sewing TNT patterns. Errr I mean that I'm soooo good at planning that I keep it secret from myself. But Frog knows...he knows everything.
Before you get ideas of bribing Frog for my dark secrets, let's talk about the two TNT patterns that I used. The first is the Nettie bodysuit, a pattern that gets worn on a weekly basis.  My wardrobe has needed a longer sleeve red version for months and I finally got around to filling that hole. There's nothing new to discuss fit or design wise here. It's the high back/scoop front version with the back and shoulder mods that were detailed in my review of the pattern.  It was also sewn in the same Lillestoff red jersey. It turned out to be exceedingly hard to find bright red cotton jersey in the middle winter.
TNT two is a little bit more fun to talk about. See I bought this Micheal Miller print, "Out to sea," last year after loving it on both Roisin and Jo. There were no exact pattern plans for it at the time, I just snagged 3 yards from Hart's fabric and stashed it. Then last month I stumbled across a lady on Instagram that was wearing a circle skirt in this exact fabric. Yes, Yes!!! That is precisely what my fabric wanted to be.

However a straight circle skirt pattern wouldn't do because of the 45" width of the fabric and the horizontal pattern motif.  I did a bit of brain storming and decided the best way to solve the problem was to use a gored skirt pattern and increase the amount of sweep to the pieces.  So I grabbed the skirt portion of the Odette dress and New Look 6056 to use for my experiment. Thanks to photographer Frog it's also been documented for you. He wears many hats and all of them at a jaunty angle.
I really like the hem sweep on New Look 6056 and wanted to add the same amount to the Odette skirt.  Before beginning the drafting, both pattern's hem lines were measured to find out the difference between them.  I found that NL 6056 hem sweep was 14.5" bigger on the half.  That meant 7.25" needed to be added to each of the Odette panels to get the same sweep. Here's how you go about doing it.

Step 1. Trace the CF panel of the the Odette skirt.

Step 2. From the hem area of the skirt measure out 7.25" and mark. I usually line the ruler up with the angle of the existing hem for now. We'll edit that later.

Step 3.  Draw in a new edge to the pattern. (Since I already have a waistband drafted for Odette the new seam was started 5/8" down from the waist edge. That way the waist circumference is not increased.)

Step 4. Next draw in the seam allowance.

Step 5. Place the Side Front pattern on top of the stitch line and mark were the bottom of the pattern falls.

Step 6. Adjust the hem sweep curve so that two pattern pieces will have the same seam length. If you have a hip curve ruler use that. You can also fudge it with a french curve.


Step 7. Trace the side front pattern piece.

Step 8. Add the 7.25" to the non side seam side edge. (The side seam has two notches for pocket placement if you get confused.)

Step 9. Draw in the new pattern edge and seam allowance.

Step 10. Place the already modified center front on top and use it to adjust the hem sweep curve like before. (Also double check that you have a seam notch that matches between the two pieces for assembly.)


Step 11. Repeat these steps to the Center Back and Side Back pieces. After you are done altering all the pieces the skirt can be sew together in the same manner as outlined in the Odette directions. Bonus you'll have pockets if using the pattern.

With the added sweep the seam lines disappear into the folds and you get the look of a circle skirt.  I was just able to squeeze out the size 12 skirt on 3 yards of fabric. The boats aren't exactly matched across the CB, but there was literally no more fabric to tweak that. Slightly irksome, but at least I can't see my backside when wearing it. ;)
So there we go, two TNT's and a little hack to start out the week.  Spring is in the air and it's going to be pretty dress sewing season soon. Can't wait!

Sewing with the Pattern Stash - The Frankenpattern

3.09.2015

In the last post I talked about a few ways to sew with patterns that are already in the stash. Like many of you, this is an area that I have problems with. A brand new pattern often seems more exciting than a pattern bought last year. That new pattern doesn't have any "planning baggage" yet or been mentally sewn it up in my head several times.* It's new and shiny and I love it soooo much, until the next thing comes along.....and there's always a next thing. Ummmmmm, it's a bit problematic.

Since I'm the Stash busting theme host it seemed only fair to put my "money where my mouth is" and sew only stashed pattern this month. Luckily for me a really fun Frankenpattern idea popped into my head and got the ball rolling. Let me present a mash up of the Elisalex bodice and Burda 6834 flounce skirt. It's business time flamingo dancer.
Now you all know my fabric stash is large, but I have a pretty good memory about what's in there. Rarely do I stumble across something that I have no memory of purchasing.  However during this fabric cull I found 2 yards of red wool crepe that was a complete surprise. As frog is my witness I did not buy this fabric. Most likely it came from my grandmother's insanely large stash and she sneakily stuffed in a box for me. Well played grandma, well played. Also you knew what I liked and I wish you were still around to give me side eye about what I pay for fabric. Grandma didn't pay retail, she bought auction lots. Lots of them.
Grandma's wool crepe knew what it wanted, just like grandma, and told me to combine these two patterns. Not that I needed to be talked into it. Slim red dress with a fun flounce? Yes please! Since both patterns have princess line seams they were pretty easy to fit together.  Here's how I went about it.....

1.  The first version of Burda 6834 I made sits below my natural waist. It seemed prudent to add some additional length to the pattern if it was going sit higher. Two inches of length was added to all the skirt pieces at the lengthen/shorten line. (I could have gotten away with half that length.)

2. The Elisalex bodice was walked along the waist seam of the skirt to compare the princess lines seams. The skirt princess line seams were moved to match the bodice's.  The front skirt matched without any changes and the back needed a slight tweak.

3. After the princess lines were adjusted, the side fronts/backs were walked along the waist seam. A sizable amount, around 3/4", needed to be removed from the skirt side seam.

4. The skirt has an angle in the princess line as a design feature. I decided to smooth this out into a curve by adding a bit to the side front seam line and removing a little from the center front seam line.
After doing that bit of pattern making work, the two patterns matched perfectly.  I had very little trouble sewing the dress, other than some goofy mistakes sewing back skirt pieces in the wrong way. Oh the hazards of fabric with no wrong side and late night sewing. If the flounce seams hadn't lined up oddly I might have never noticed the problem.
This baby looks great in photographs, but there are a few confessions that need to be made......

1. The lining shows through.
I didn't even think to check this since there were no issues with lining my Christmas dress. It's not too noticeable in the photographs, but in real life you can clearly see it.  As fate would have it, the see through affect wasn't noticed until the entire dress was almost finished. At that point I decided it was a "design element," like a lace overlay or something.  Yeeeeah, I know the lining should be switched out but I'm not gonna do it.

2. Not all fitting changes were transferred to the pattern.
OK here's the deal. The Elisalex bodice was made in a larger size for the red roses dress in October 2013. Some time last year I'd traced a smaller size and "thought" I'd sewn it up into some garment. Wrong, the smaller size never got sewn up till now and I certainly forgot to transfer over some armhole adjustments. The armhole is very tight and lining it didn't help the situation. Oops.

3. Stretch woven and non stretch woven do need different amounts of ease.
Another big oops on my part since this fact didn't cross my mind pre cutting.  Both of these patterns had previously made with a stretch woven, but I'd forgotten that fact. When I put on the red dress there was a moment of, "Why is this tight across the back and the hips.....oh yeahhhhh no extra stretch."  In hindsight I should have muslined this dress to double check the fit in a regular woven.

4. No amount of under stitching, clipping or pressing would keep the lining from rolling out of the neckline.
I finally had to top-stitch the edge of the neckline to stop the lining from peeking out.  Growl. Having top-stitching in one location seemed odd. I decided to top-stitch the sleeve hems and skirt hem to balance out the garment.
So that's the knitty gritty on my slight fitting fails. What I should take away from this is to always muslin pattern mash-ups just to be sure. Now you know why I make all those muslins and have a quality control Frog. Wait....shouldn't he have told me to drop the armholes? Lazy frog.

Other than a bit of tightness in the arm holes, the fit isn't that far off. It's probably only something I'd be concerned with. "Oh no, it's 1/4" too tight, The Horror!" This dress is still going in the win column since it makes me want to do something like this all the time. Wheeeee dancing!
Hope everyone who is participating with the theme is having good luck so far. Many of you commented with excellent plans. May the sewing goddess bless you with plenty of machine time to crank out these projects.

*Why doesn't mental sewing result in a real garment? Science get working on that. Not like you need  to cure cancer or anything. Sewing is now your Top Priority.
Proudly designed by Mlekoshi pixel perfect web designs