Hi everybody, it's time to put on your learning caps cause pattern drafting class is about to start. Today's lesson is how to draft a bodice with diagonal princess line seams. This drafting is a little bit more advanced than some of the pattern hacks I've blogged about in the in the past. Don't worry though because it's quite logical and we'll go through it step by step.
I mentioned in the
teacups dress post that the Emery bodice was used as a base for this draft. I chose Emery because the bodice very close to a bodice sloper. You could use any bodice pattern that is similar. It should have a waist and side seam darts on the front, a waist dart on the back and have a neckline on the shallow side. Colette's Peony would be another good example, as would be the Big 4's fitting shell patterns. In this tutorial I will be using a copy of the Emery bodice with all seam allowances removed. I highly recommend doing this for two reasons. One, you don't have to remember what edges already have seam allowance and what edges need it added. Two, there is no confusion when marking measurements, they all fall on the seam line. I know some of you hate adding seam allowance to patterns, but in this case it will make your life a lot simpler. OK, besides a traced copy of your bodice you'll need, scissors, tape, pen/pencil, a straight ruler, a french curve and if you have one a hip curve.

If you don't own a hip curve ruler than you can get by with a french curve. Let's begin.
Front Bodice
1. Unless your bodice was drafted to be sleeveless you'll need to raise the armhole. Since no sleeve will be attached you need less ease and most of us prefer having bra coverage. On Emery I raised the armhole 5/8" and redrew the armhole with my french curve.
2. For the rest of the steps the bodice will need to be cut out. Go ahead and cut it out along the seam lines if you haven't already.
3. Next step is to narrow the strap area. On my dress I made the straps 2" wide. Measure this from the neckline side and mark.
Use the french curve to redraw the armhole to meet the new mark.
Then cut off the excess paper.
3. Now we are going to rotate the side seam dart into the waist dart. To start, measure the dart intakes at the outside edge and mark. Use those marks to draw a line through the center of the dart and out through the tip. Do this on both darts and extend the lines so they meet. This will mark the bust apex.
Cut along the bottom outside leg of the side seam dart, up the line to where it bisects the waist dart.
Cut along the left outside leg of the waist dart, up the line to where it bisects.
You are going to "close" the side seam dart. To do this pivot the cut out bodice piece until the bottom side seam dart leg meets the top leg. Tape the pattern there.
There will be a little overlap at the tip of the dart, that's fine as it's a small amount of ease eliminated. Also don't bother filling the gap in the new larger waist dart. We will be closing that dart in a later step.
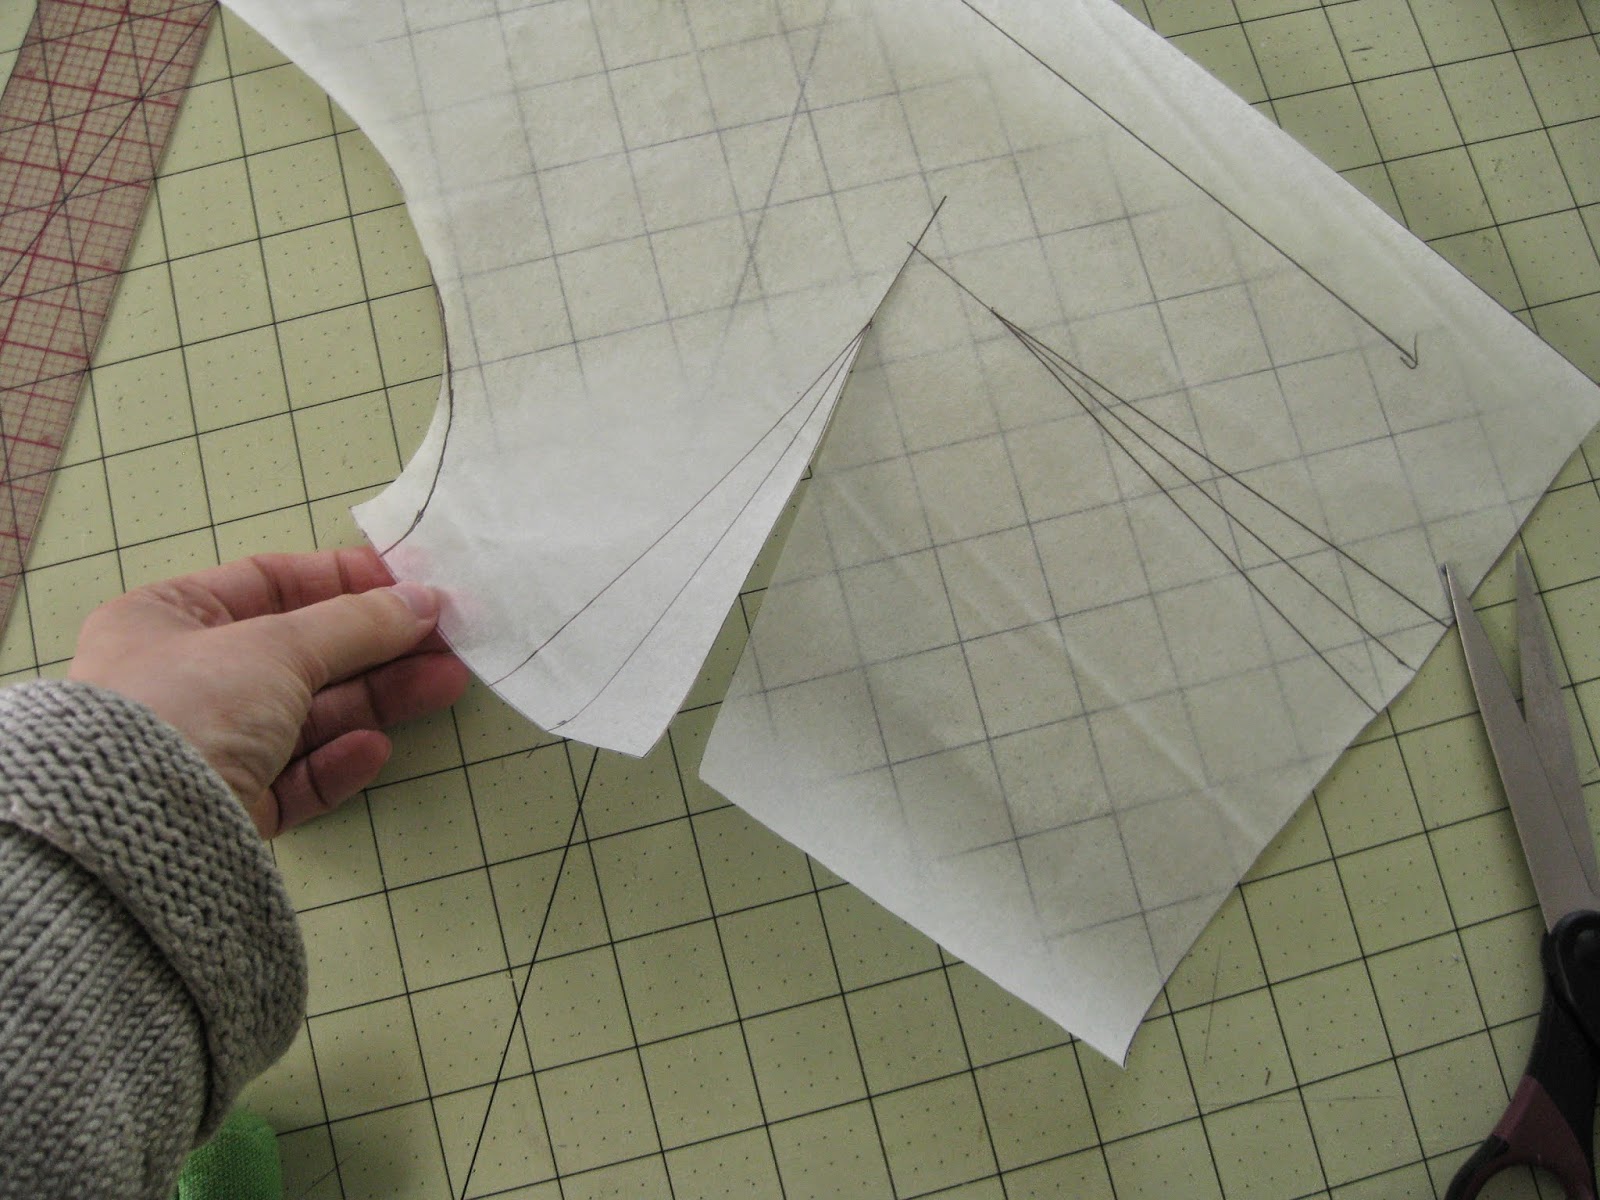
4. Let's get the new neckline drawn in before chopping up the bodice further. I'll be using a hip curve to draw the neckline and the style lines. This ruler has a very shallow curve to it, which allows me to give the seams a slight curve. If using a french curve, use the flatter tail end and you may need to reposition it to draw the entire line. OK, back the neckline, using your straight ruler mark how far down you want it to be on the CF. The depth of the V is a matter of personal choice, mine was about 4.5" down from the original neckline. Use the hip curve/french curve to draw a new neckline from the CF mark up to inside edge of the strap.
Then cut off the excess paper and your neckline is done.
5. Time for the first diagonal princess line. The position of this seam line matters because it will cross over the bust apex, thereby providing the bust shaping for the bodice. The other seam line is just eye candy and could be drawn in any location. The most important thing about drawing this seam line is that it touches the bust apex/line intersection point. You want to do that and keep the seam line mostly parallel to the neckline curve. I've laid my hip curve on the bust apex and let it dictate where the seam line falls on the armhole and CF.
You can tweak the armhole/CF positions a little if you want a curvier seam line. Just keep the middle on the bust apex. If you like to have notches on this seam, then mark some hashes on the line now. Once the seam line shape is to your liking then cut the bodice apart on it.
6. Now that the top part of the bodice has been removed we can close the waist dart. Pivot the right hand side of the bodice until the two waist dart legs meet. There will be a little gap at the top of the dart, that's just a little extra bust ease for the pattern. Tape the dart closed.
7. Time to draw the second seam line. As I said before it's location is not important to the fit, you can put the seam line where ever it's aesthetically pleasing. Mine starts 1" below the armhole and ends 1" above the bottom of the CF. Add notches now if you want them.
When that shape and location looks good then cut the bodice apart on the line.
8. The draft of the front bodice is all finished. Label those pieces top, middle and bottom before they get away.
Back Bodice
1. The back bodice draft is very similar to the front but we'll go through it step by step. Start by raising the back armhole the same amount as the front, 5/8" in my example.
Then cut out the bodice on the seam lines.
2. Shoulder strap area - Emery does not have a shoulder dart, but if you are using a different pattern there might be one in that location. If you do have a shoulder dart, then rotate it into the waist dart. Draw a line to connect the two dart points and cut long the outside legs. Close the shoulder dart just like you did with the side seam dart on the front. Once the dart is removed the shoulder strap area can be narrowed to match the front.
If using Emery just start with this step. Measure 2" from the neckline side and draw a new armhole edge.
Then cut off the excess paper.
3. Since our design has a back V-neck we are going to cut off the back neckline dart instead of rotating it anywhere. On the CB make a mark where you would like the point of the V neck to land. I put mine at 6.5" down from the original neckline. Use the hip curve/french curve to draw the new neckline.
Then cut off the excess.
4. Next we are going to draw in the upper seam line on the back bodice. Grab the upper front piece of the bodice and lay it on top of the back. Make a mark on the back armhole so that the seam line is drawn in the same location as the front.
Take the hip curve, put it on the armhole mark and on the tip of the back dart. Like on the front you want to keep it as close to parallel to the neckline as possible. Draw the new seam line in and add any notches if you want them.
Once the seam line shape is to your liking then cut the bodice apart on it.
5. Time to close the back waist dart. Cut the dart along the dart leg all the way up to the seam line cut.
Pivot the bodice till the two dart legs touch and the dart is closed. Tape down the bodice in it's new location.
6. Now that the dart is closed we can draw the final seam line. The two lower seam lines need to meet in the same location on the side seam. Make a mark on the back side seam in the same location as you did on the front. For my example that is 1".
I also made the CB mark at 1" from the bottom just like on the front. Use the hip curve/french curve to draw in the new seam line.
Add in notches if you wish and cut the bodice apart on the line.
7. Back bodice draft is now finished. Label your pieces again so that you can tell them apart from the front.
Now that all the drafting is done you can add seam allowance to your pieces. You can either tape the cut pieces of the bodice to a block of paper and add seam allowances to that. Or trace the cut pieces onto a new piece of paper and add seam allowance to the new copy. Here's a look at my actual pattern pieces, I did the trace method.
You can add 5/8" seam allowance to all the edges like commercial patterns or vary the seam allowance if you prefer. I've make the diagonal bodice seam lines 3/8" and the rest of the seams 5/8".
As always I strongly encourage sewing a muslin before cutting into your good fabric. Save the fabric, make a muslin! I don't want any accidental wadders on my conscious. Hopefully this tutorial is fairly clear, but if you have any questions feel free to leave them in the comments. Happy Drafting Everyone!


Great photo walk-through! Thanks for the refresher - it's been a while since I've messed with dart rotation. =)
ReplyDeleteThanks Brooke. I kind of like rotating darts cause it always seems a bit magical.
ReplyDeleteThanks Maeve. I'm probably too lazy to produce my own patterns and it really seems to cut into your sewing time. ;)
ReplyDeleteMind boggled! Yeah! Why aren't you making your own patterns?! Duh! Lazy my butt.... Although I agree it would cut into your sewing time...and that would not be a good thing at all! The pretty dress wardrobe needs continuous restocking!
ReplyDeleteI can't quit the sewing machine! If I was to be honest, this whole making your own patterns to sell seems to have a lot of steps I know nothing about.
ReplyDeleteThanks for putting this together! I've got it pinned so I can come back to it when I eventually have sewing time again (and knock my to-do list down a bit).
ReplyDeleteExcellent /\ I will lurk on the bottom of your to-do list . ;) I think you can knock this out no problem Becky.
ReplyDeletePhew. A lot of photos but really makes it clear what needs doing! Great work!!
ReplyDeleteThanks Amy, glad you found it clear. ;)
ReplyDelete