Cordova Enforcer

4.24.2013

Hey, It's time you and I had a little talk, see.
It's come to my attention that you ain't been paying your "blog reading rent" money. What you think you get these crazy stories for free? Nah Nah, it don't work that way kid.  You fork over some "bread" cause it would be a darn shame if something accidental like would happen to your sewing machine.
Whaz that? Sure I take fabric as payment, why don't you hand over that silk there and some of that jersey knit.  Ahh that's a good kid.  Ain't she a good kid Vinny?  Here have a cookie, you're alright.
Ummmmmm...please pay no attention to the "Faux Badass" above.  Turns out you put a little faux leather in her Cordova and she starts getting crazy ideas and threatening people with hip curves.  She's been properly medicated now so everything is fine. Here's your fabric back, we're still friends right?

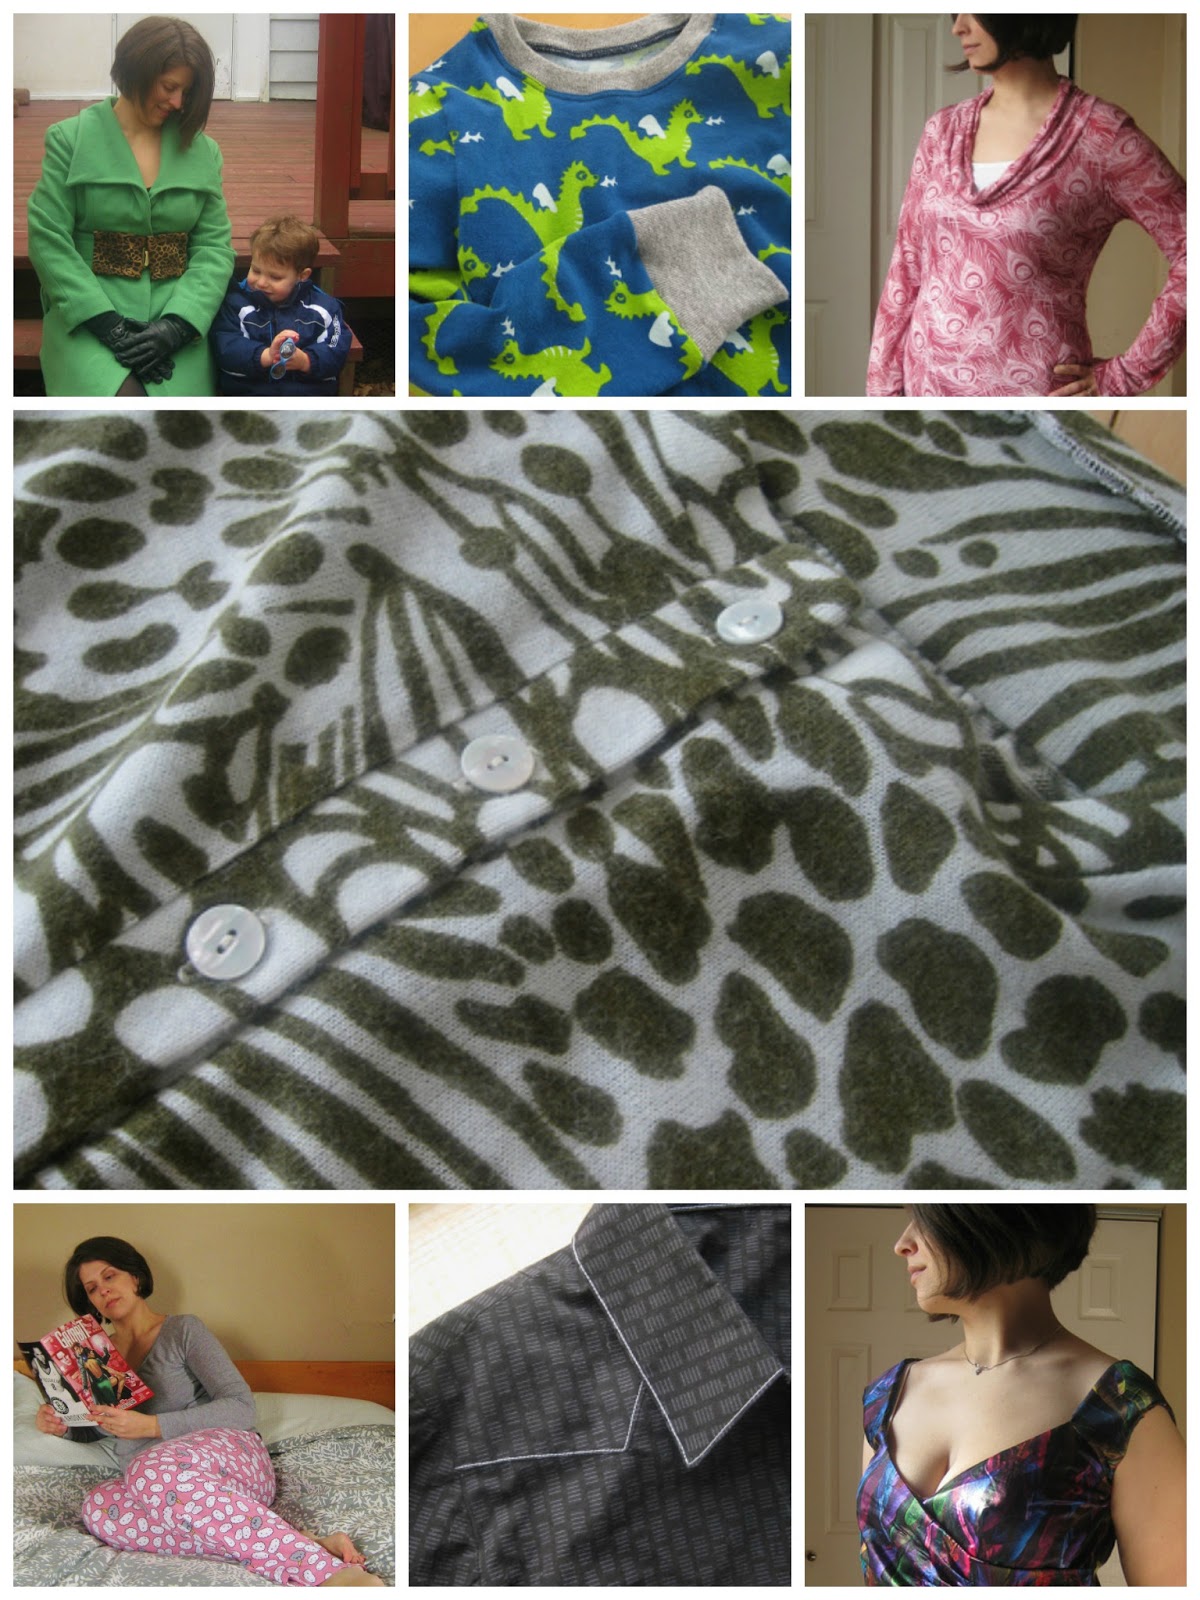
OK enough crazy stuff, on to a proper pattern review. 

Pattern
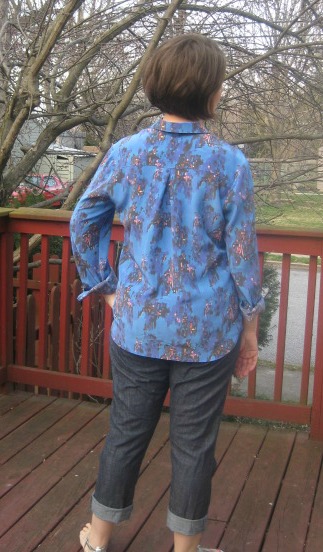
Sewaholic Cordova Jacket

Fabrics used
Royal Blue wool suiting inherited from grandma's stash.  Black Faux leather purchased from emmaonesock.com a long long time ago.   Flower print lining purchased from Gorgeous fabrics also far in the past. The stashed 24" black "metal"coil zipper was purchased marcytilton.com but you can also purchase them directly from Ghee's.  (It's a plastic coil with a fancy silver color on it)

Pattern changes/alterations
1. As discussed a bit in the muslin post on this garment, I went with the single peplum tier option and drafted my own 1 1/2" wide neru collar.
2. The jacket length was increased by 1 1/2" for my own personal hem preferences.
3. Forward should adjustment of 1/2".
4. Sway back adjustment of 1 1/2".
5. The side seams were taken in 1".  This means I had to make a 1" fold in the middle of the peplum piece which was tapered out to 1/2" at the hem.
6. Filled in the back armhole and princess line seam for a broad upper back adjustment.
7. The garment was oddly caving in on my upper chest and the armhole edge was too far out over my shoulder only on the front.  Too kill two birds with one stone I took in the front princess line seam 1/2" right above the bust and tapered to out to 1/4" at the shoulder.

Confessions/Advice
1. I wish there was someone regularly stocking faux leather with a knit back because it was VERY forgiving.  You do get needle holes but the knit backing keeps the fabric from weakening.  I had to rip out portions of the collar several times and the fabric still looked good in the end.  It's a pain to sew on the right side, even with a tephlon foot, so most of the seams were done on the wrong side.

2. I'm not 100% happy with my self drafted collar, it seems to want to cave in around the zipper.  Sewing together the seam allowance of the facing and leather piece did help but not as much as I'd hoped.  In hindsight I probably should have built up the neck line a little more before drafting the collar.  Also, don't face your collar in wool suiting, it's itchy.

3. I skipped the topstitching around the zipper just because I could not get it even .  Too bad, it would have looked good. (I was using the topstitching foot BTW)

4. Must have made a measuring mistake when lengthening the jacket because the center back hem was not long enough to fold all the way to the facing. I tacked in another piece to make it the right length but that added some extra bulk you can somewhat see while wearing.  A better option might have been to cut the piece down to a 5/8" seam allowance and given it a facing of it's own.

5. I sewed an orphan, peeps.  Going to have to make some black pants to go along with this.  Oh NO! Not Pants!

Husband Comment
"It looks like something a character on Star Trek would wear, except for the fluffy crap on the shoulders."  (Not a fan of shoulder pleats it seems, too bad cause I like'em!)
My Final Thoughts
This project benefited from some closet marination time.  The collar and back facing issues where right at the end of the sewing process and I was beating myself up about not catching them in the muslin.  Now that a couple of weeks have past I can say these issues aren't that noticeable. 

Looking at the photos has made me realize this jacket is pretty awesome!  Love the color/fabric combo and the zip front.  The style changes I made suit me rather well, just need to make some bottoms to go with the jacket. Now excuse me, I have to return these legging that have no butt room. (It never ends)

Me-Made-May this year I'm in!

4.20.2013

I'm pretty excited to participate in Me-Made-May this year cause it's my first.  That whole "keeping a tiny human alive" thing kind of cramped my blog reading for awhile, so I didn't find out about this zeitgeist until it was over last year.  "What's this the kids are doing? Taking pictures of their outfits? Where are my prunes?"

Since I've made about 75% of my wardrobe for several years, just wearing a Me-Made didn't seem like enough.  It's supposed to be a challenge after all so, what crazy plan can I torture myself with?  Then the giant pile of stretch laces fell over and I had an answer, make some *&$^#* bras already.

Back in January the bra making bug bit me and a large cache of supplies was stockpiled.  Nothing like an excuse to create a new stash niche! There are patterns,  fabrics, underwires, hooks, even a complete custom dyed kit bought from Hooks and Wires on etsy.  It's all been looking at me with sad eyes saying, "Why did you buy us just to stuff us in a drawer?"
What? Shut your sassy mouths and get back in that drawer....but not before I pet you.

For an extra dose of confidence in this crazy scheme I bought the Orange Lingerie e-book "Demystifying Bra Fitting and Construction," and am reading it in "The Cloud"  (Seriously who came up with that term?  I worked in software and it still sounds like made up bull honky.)  Not far enough into the book yet to say much more than the writing stay is nice and clear.  It gives me positive vibes that I'm not so cray cray after all.

So let's make this whole plan official shall we,

I, Heather of Handmade by Heather B, sign up as a participant of Me-Made-May '13. I endeavor to wear me-made items at least 5 days a week for the duration of May 2013. I also pledge to have at least one me-made bra and pantie set by the end of the month.

Look forward to 15 pictures of me wearing the fangy clouds lounge pants and the narwhal shirt. Sexxxy

My Sewing may be Cursed

4.18.2013

Beware blog readers, it seems I've pissed off some sewing goddess and she has cursed me. (Cursey, cursey, curse, curse.)

I've completed 4 muslins of Burda 7447.
They seem to be progressively getting worse.
It's makes me want to stick blunt objects in my eye, until I remember my eyesight is terrible already.  New plan, fit without corrective lenses on. What under butt wrinkles? I don't see a thing!

Still we've all admitted that pants fitting is hard and my twitter peeps are helping me out.  I didn't think about curses, just the eternal pregatory of pants fitting that is my lot for loving cookies. Cookies, I can't quit you.
P.S.  Here's the recipe link for these, they are amazing

Damn there are no cookies in my house.....but what were we talking about? Oh yeah, cursed sewing.

So I cut out a Renfrew, a project I've made a gazillion times with out a problem and the darn thing was too tight!  What?!!!  Seems that beefy jersey that's been sitting in the stash doesn't stretch nearly enough. Fine beefy jersey have it your way, I'll covert you into some sort of baby shirt....probably never.

So what do you do next?  Buy a new pattern, hooray new digital pattern smell!

I got the Kimono Tee from In-House patterns cause I like trying new pattern companies.  Also a lacy yoke is so in right now and I wantz it, precious.

This should have been super simple, a couple of pieces/9 seams max and it would have been if aliens hadn't stolen my brain overnight.  So many brain dead sewing mistakes where made... I sewed the right front side seam to the left back side seam for shits sake.  I is college graduate of sewing skillz?  No?

Some seam ripping and cursing in front of the baby fixed that (sorry son) but it could not fix the fact that the shirt was GINMOROUS on me.  Oops, maybe I should stop ignoring this "comparing the flat pattern to your measurements" stuff.  I should....but I won't. #bullheaded

It's really quiet clear that none of these problems were "my" fault, right?  It's a sewing curse...guess I better get Jobu some rum and a bucket of fried chicken.

Silky Spring Archer

4.13.2013

Once upon a time this garment maker strayed across the Wiksten site and fell in love with everything she was doing.  Being out of her size/price range I made due with just snapping up all her sewing patterns and then serially stalking her blog.

I might have drooled on myself when she collaborated with Dealtry and made the most lovely print imaginable.  I think it's frowned upon to put your kid up for adoption to get money to buy silk tanks and dresses, so again I had to admire from afar.

Fast forward to last year when Jenny tweeted that she'd set up a spoonflower shop with several of her prints.  I threw some goldfish crackers at my kid and grabbed my credit card.  "Don't bother Mommy she's buying custom printed silk." Muhaaaa all the pretties will be mine!  I'm still surprised by my restraint only buying the fall colorway in silk crepe de chine.  It seems that all of you love it too because it was the number one choice between blog comments and tweets for the Archer sew-a-long.
I might have already finished mine, over achiever that I am.
Come closer while I strike a pose
On the back I increased the sway back alteration another 1/2" and think it looks better than the first shirt.
And now the real test, toddler action shots.
This was a perfect fabric/pattern pairing so thanks blog readers, you were so right.

FYI - The pants are Hotpatterns Weekender boyfriend jeans made last year.  They do not fit exactly right because "cycle of pant fitting hate," but I still like them.

Pants fitting - the cycle of hate

4.10.2013

Hello blog readers, this is a post that I debated about writing. While I'm not an overall positive person, I do tend to be positive about my hobbies.  And to say something is hard often discourages others not to try it/increases their own doubts about trying it.  But I've decided this is an area where I just need to vent and maybe you'll just shake your head in agreement.  Ok here goes....

Pants fitting is hard!


So now let me give you some back story.  I haven't had a proper fitting pair of pants since I hit puberty and developed the family derriere.  The family derriere is large in proportion to the rest of the body and is very full at the bottom and ski slopes into the lower back. So that old adage of "take a pair of RTW pants that fit well," makes me want to grab said writer and smash their head into a wall repeatably.  (SHE HULK SMASH!)

What if every pair of pants you've every bought gaps wildly at the CB and yet does not give you enough butt coverage to confidently bend over?  (Other than maternity pants, which where the shizzel.) What if you've been living with a semi-wedge all your life that you're not even sure what a properly fitted pant is supposed to feel/look like?  What if the properly fitted pants you see in fitting books looks like something your grandma would put on with her Keds to go buy mass quantities of fabric at auctions? OK maybe your grandma plays bingo, but you get my drift.

I've been working diligently (in spurts) on pants fitting since 2011.  I've purchased several books, read blog posts, bought craftsy classes, talked to other sewcalists and still the cycle of pants fitting hate continues.  It goes like something like this...
1. See slim blogger with "flat white girl butt" rocking a newly made pair of pants.
2. Think that looks fantastic I must buy that pattern.
3. Full of enthusiasm the pattern is purchased with thoughts, "This time I'm gonna make some awesome pants and look fabulous too."
4. Pattern is traced and first muslin cut out. Dreams of fabulousness continue with planning shirts that will go with the awesome pants.
5. 1st muslin is tried on and I am once again confronted with "yes my ass is that big."  Still optimism remains, I have fitting books.... I can fix this.
6. Make 2nd muslin, try on. Think "I added 3 inches to the rise, how can this thing still be giving me a wedgie!  Also what's with all the wrinkling on the back of my thighs?"
7. Make 3rd muslin, try on... there is still not enough ass room.  I start scooping out the crotch but somehow it makes very little difference. My brain starts musing that the right measurement for the back crotch length must be some made up equation like (The airspeed velocity of an unladen swallow - the number of red shirts killed in original star trek episodes x a number that Nathan Fillian is thinking right now.)  Decide to add length to the front crotch too.
8. Make 4th muslin, try on... now the damn front is f'ed up and the back looks exactly the same.  A pox upon you pants!!!
9.  Remove front crotch alteration, scoop back crotch even lower, extend back crotch another inch.  Make muslin #5, try on and.......@#&%^*(@&#%%  the back looks exactly the same as it did in muslin #2.  Commence a 15 min rant about how pants are a dirty dirty b**ch to my confused husband who replies with, "I thought your hobby was supposed to be fun."
10. There's a 50/50 split on the final step in the cycle of pants hate.  A. I make the pants anyway figuring they are slightly better than RTW cause they don't gap at the back, or B. I light the pattern on fire while laughing maniacally and then go make knit tops.


This is my long ass way of saying I'm in the middle of pants fitting again and I see the cycle of pants hate repeating and it frustrates me.  I don't want to hate pants because I vastly prefer wearing them. (Probably because I fall down a lot and not giving strangers and accidental up skirt shot is a real concern.) I want to be able to figure this out and then rock some (non granny) pants even though I have a giant ass.  Is that really too much to ask for?  Well I'm still on step 6 of the cycle of pants fitting hate so maybe, maybe this time things will be different. Cross your fingers for me.

My New Sexy Love...Cobalt

4.06.2013

Hello Cobalt, I was minding my own business when you walked into the room and gave me that look. Oh you know the one.  I tried to resist you saying, eyelets aren't for me.  But you sidled up along side me and whispered, "This time they are."  Then you might have winked in a rakish manner.  It was then that I realized I had to have you.
Sure our relationship hit that rough patch when I didn't do a proper muslin. I get very cross with you and needed some time alone, but let's face, it you're too beautiful to throw out of the house.
When I pulled you out of UFO box last month you gave me that saucy grin again and I remembered our torrid love affair.  This time we could get it right....this time we did. Fin*.
*Actual sewing details.
The pattern is Colette peony with some style changes.  Using the A line skirt as a base I drafted a pencil skirt with a back vent.  The front tucks were converted to darts and lengthened a bit. The boat neck was scooped a tad lower on both the front and the back.

I got the idea to line the cotton eyelet with some silk chiffon from a RTW top tried on at Anthropolgie.  This allows the wearer to have more opacity but still retains some of the lovely airiness of the eyelet.  It also feels divine as a lining.  The entire bodice and skirt were lined but the sleeves were left as a single layer of eyelet.  I removed all facings, understitching the lining to neckline instead. (Both fabrics purchased from Gorgeous Fabrics last year)

There was a bit of trouble fitting this dress for two reasons....

Fitting problem 1 - I did not read any PR reviews before starting and did not know the back was rather wide .  My standard 1/2" of additional back width was added as well, making the problem even worse.  On my muslin I did not install a zipper and did not notice the excess fabric in the back.  It was not until a zipper was put into the real dress that the fitting problem was noticed.   At this point I got frustrated and put the dress in the UFO box for about 4 months.

Fitting problem 2 - I lost 12lb in those 4 months so now the dress was too big all over.  Now some semi-large amounts of fabric needed to be removed to size the dress down.

Final fitting changes as follows.
1. Connected the back dart and neck dark to create a princess seam in back.  This allowed me to take out some of the extra back width, about 1/2" here.
2. Took in the side seams an 1" on each side.
3. Also reduced the diameter of the sleeve 1".
4. Took in the CB seam 1" in the bodice tapering down to 3/8" in the skirt.
5. Increased the back dart intake to 1 1/4".
6. Made a 3" sway back adjustment on the bodice.
7. Took about a 3/4" wedge out of the remaining shoulder seam.  The slope of my shoulders did not seem to match the pattern with the boat neck shape changed.

The back still isn't exactly right, but it works in a pinch.  If I was to make this dress again, I'd start over again with the correct size for my current measurements and go from there.

 But for now I'm gonna enjoy my sexy new love, Cobalt

Leveling up on my stash busting pledge

4.03.2013

Back in January I joined the stashbusting-sewalong and pledged to use up 12 pieces of fabric.  Well after sewing 100% from stash in the first quarter of the year I've used up 23 pieces of fabric.  Yikes, even I'm surprised.

Seems like it's high time to update that pledge so here goes...
I Heather B, rabid sewcialist pledge/buyer of too many shoes, pledge to use up 40, yes 40 pieces of stashed fabric by the end of the year.   Honestly that would only put the most minor of dents in the stash and technically I'm already half way there.

Right now my sewing table seems to be in a blue phase, Spring is making me want to sew bright colors.
Half of these blue fabric blobs are already finished. There will be fun new FO's to show you but I'm waiting for shoes, always waiting for shoes.
Proudly designed by Mlekoshi pixel perfect web designs